
Welcome to the tutorial Waalaxy synchronized with SalesForce !
Our auto-import feature allows you to retrieve data from Waalaxy, you can export this data to other CRMs via a Zapier integration. Want to automatically transfer the retrieved data to your Salesforce CRM? It's this way! ⚡
Salesforce is a cloud-based customer relationship management (or CRM) solution that gives all departments in your company - including marketing, sales, customer service, and e-commerce - a unified view of your customers on an integrated platform.
It's clearly the world leader in cloud CRM and offers many advantages: flexibility, adaptability, standard API links, an infinite number of options with multiple applications, and many more!
Do I need a paid subscription to create Zapier Webhooks?
No. You will need a paid subscription to Zapier, or the trial version to be able to create Webhooks.
You will also need a paid subscription, Advanced or Business on Waalaxy to create Webhooks.
Link of the Waalaxy x Salesforce
I’ve prepared the Zaps for you that you’ll just have to copy / paste into your browser to automatically resume the pre-completed Zap.
So happy?
➡️ Zap Synchronization Waalaxy x Salesforce
Step 1. Go to Zapier
Click on “Create a Zap”,
Search for “Webhook by Zapier”,
Under “Event”, select “Catch Hook”,
Click “Continue” twice, skipping the “Pick off a Child Key” part,
Copy the webhook URL.
Step 2. Go to Waalaxy
Click on “Campaign” and “Create a campaign”,
Filter by the action “CRM Sync” to see all sequences that include this action,
Select the sequence,
Fill in the various fields (action, deadline, message content),
In the “CRM Sync” section :
Select the CRM that you are going to configure,
Paste the link of the Webhook previously copied,
Click on “Test”, then “Validate”,
Launch the campaign. 🚀

Step 3. Launch the Webhook
Go back to Zapier, and pick up where you left off.
Now that the campaign has been launched, you can “Validate the Webhook” on Zapier.
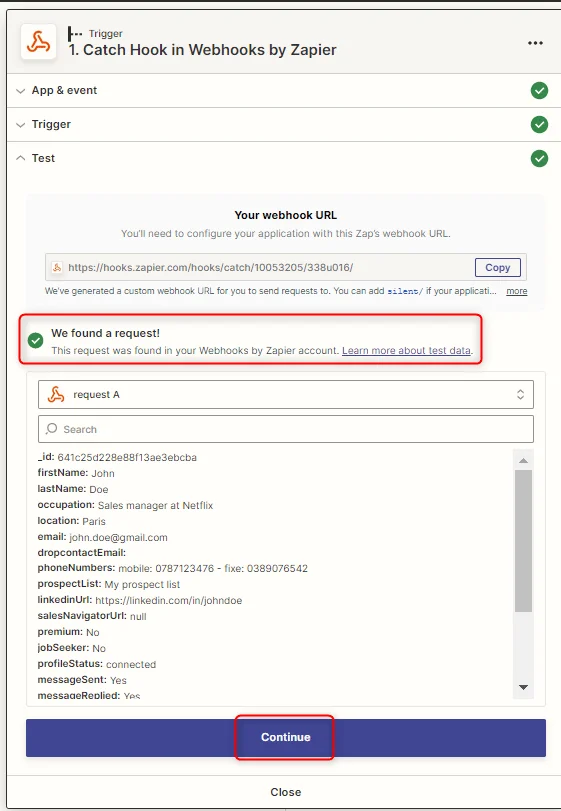
Click on “Continue”,
Step 4. Synchronise Salesforce
Click on the small "+" and search for "Salesforce".
Under "Event", search for "Create Contact" and click "Continue".
Connect to your Salesforce account.
Select the different variables in the fields you want to synchronize:
In "Name": select the variable "FirstName" and "LastName", adding a space between the two.
Then fill in the different fields:
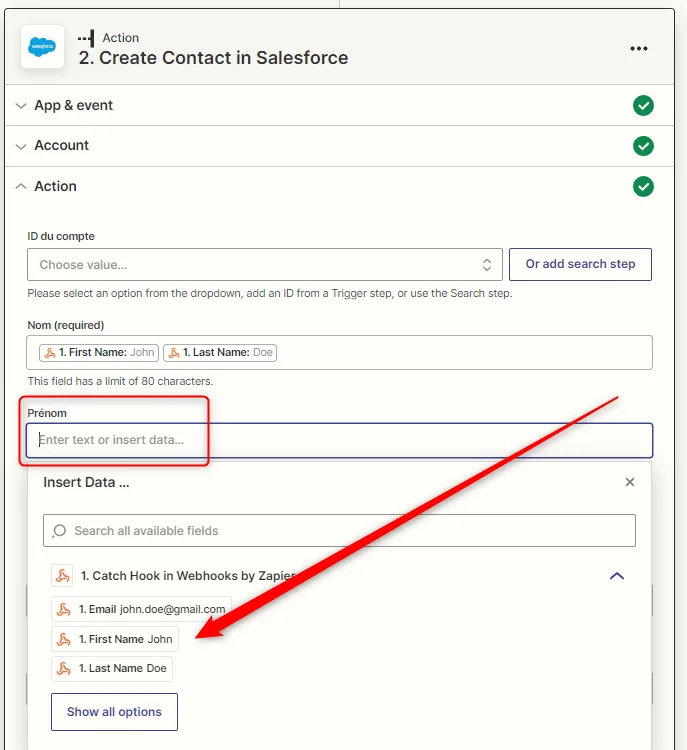
Do this for all the data you wish to synchronise,
Click on "Continue", and "Test Action",
You should get a success message:
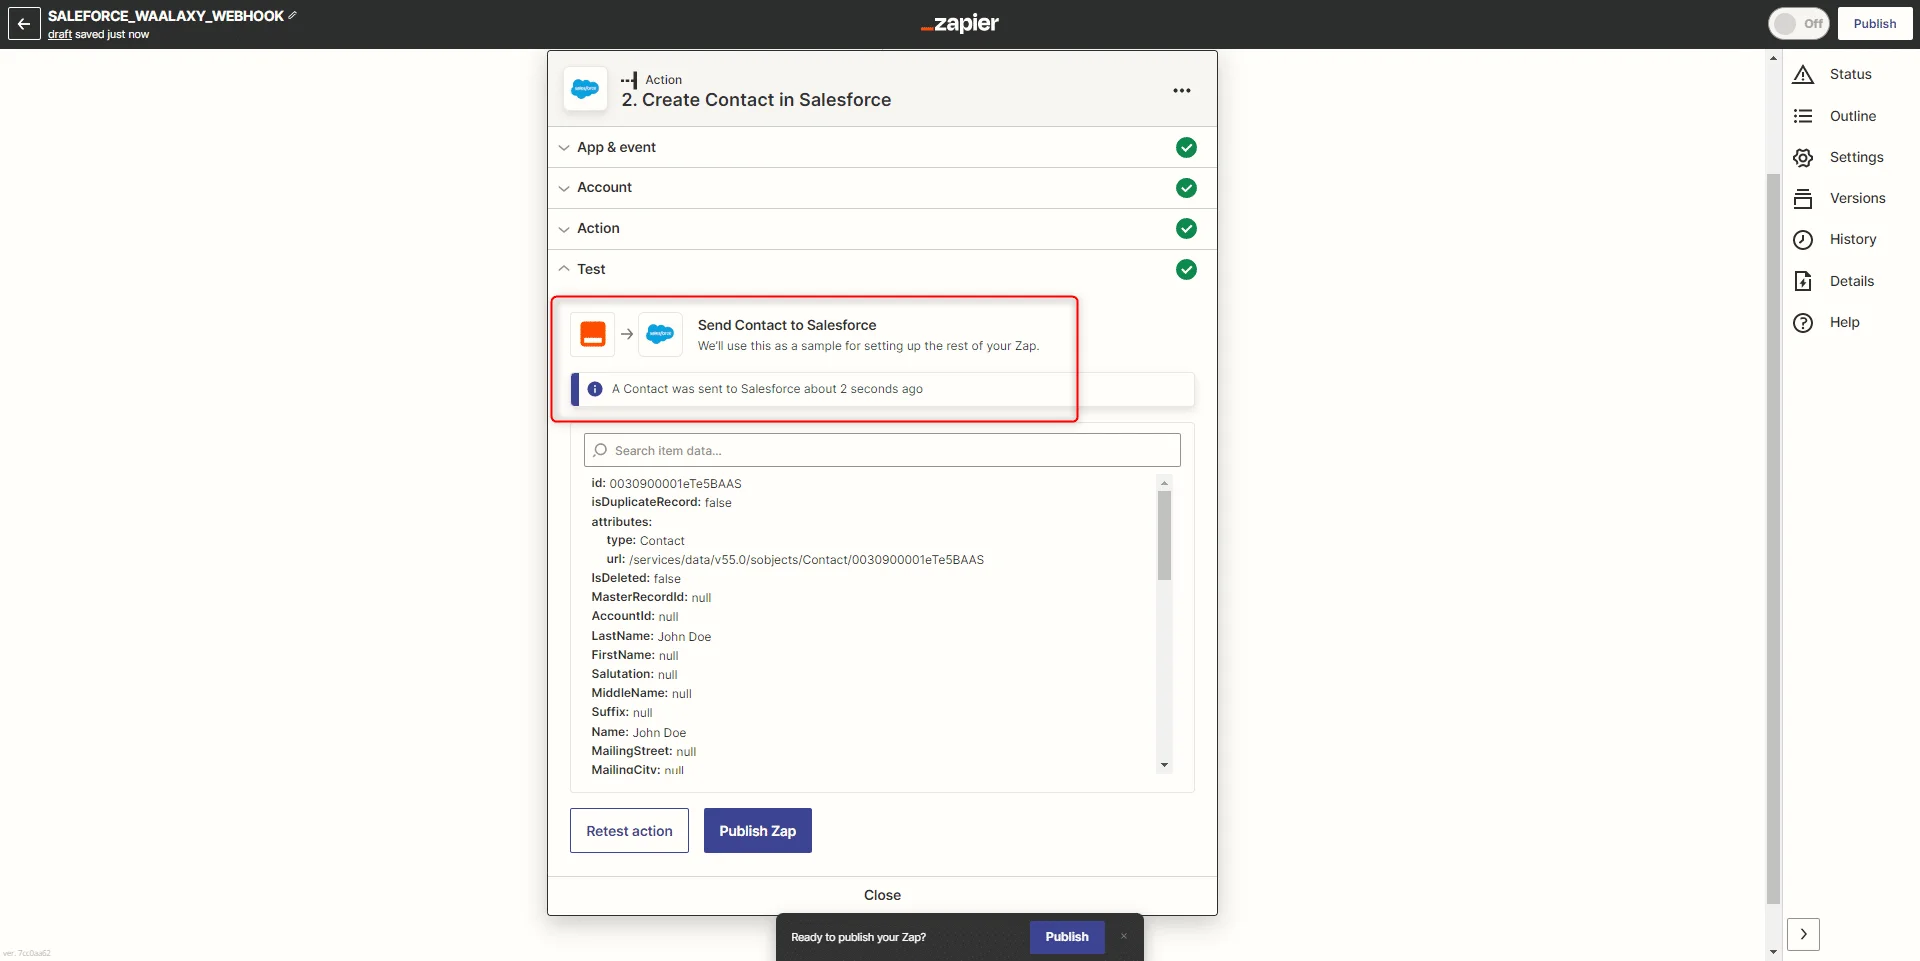
View on Salesforce
In Salesforce, you will find the imported contacts in "Contacts":
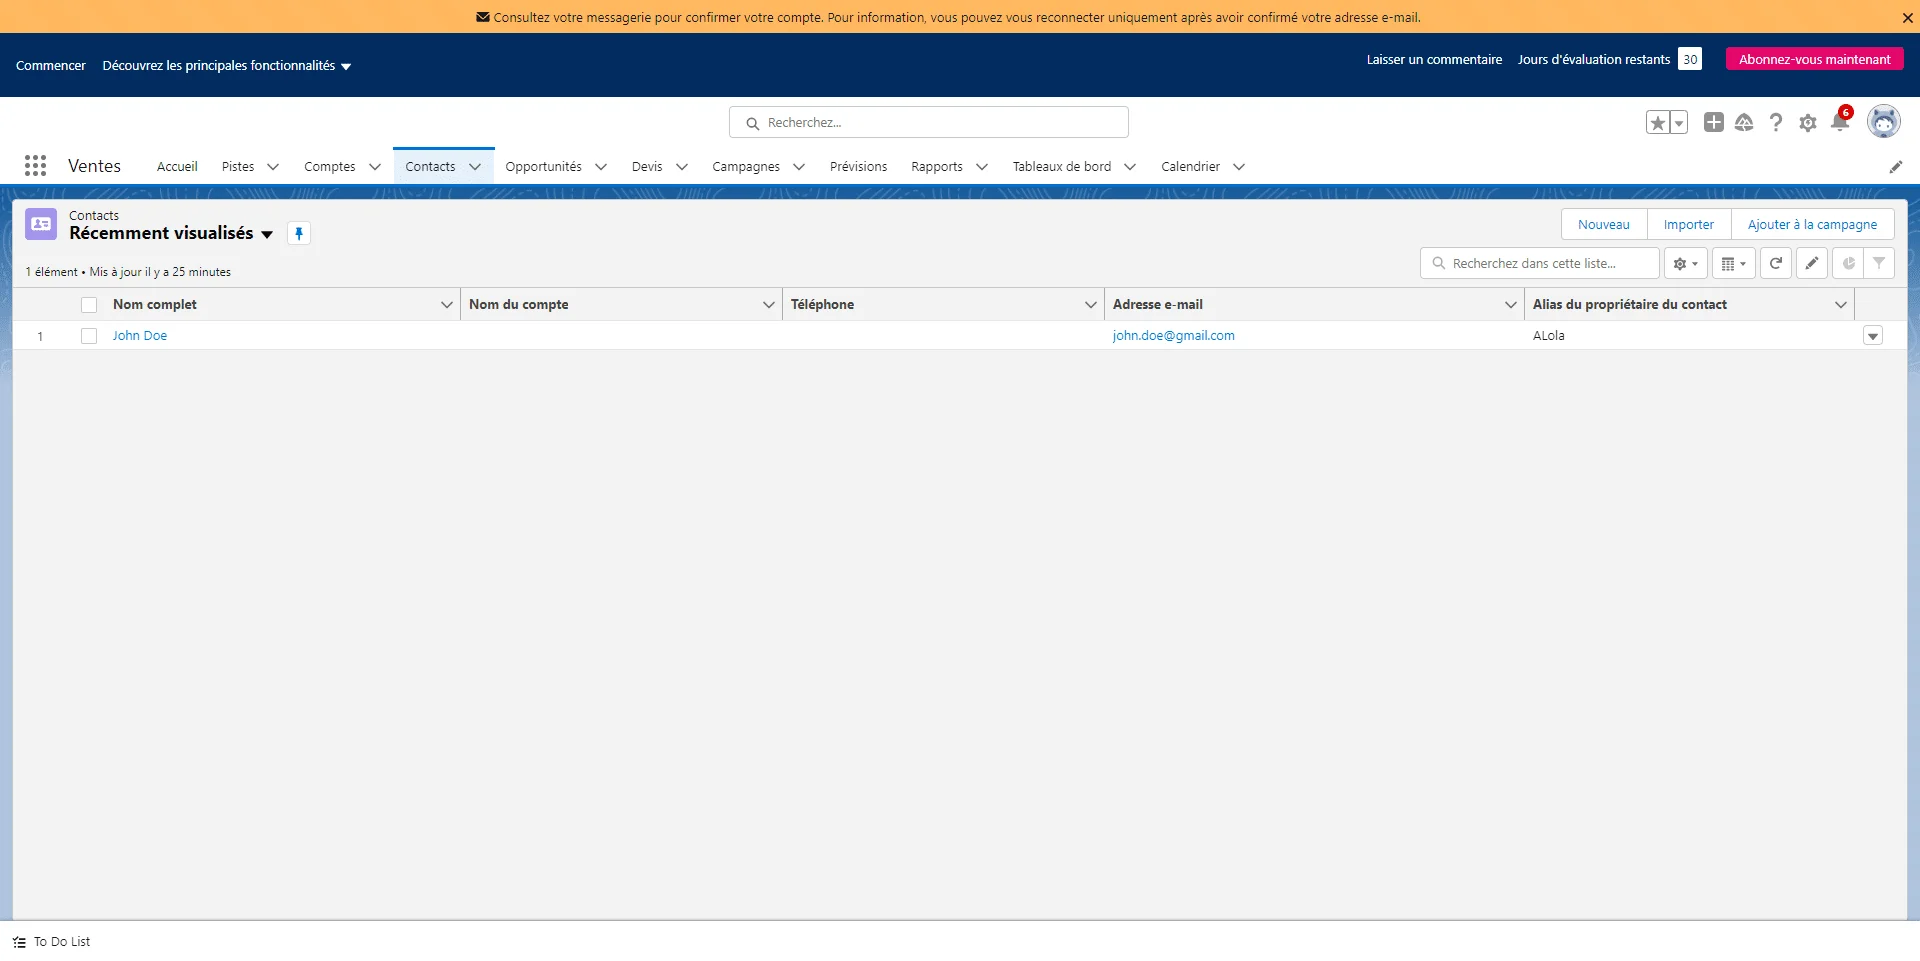
Well done ! 😎